
Benches & Backrests
I spent quite a long time planning the sauna benches. Because the cabin is only 1.72 meters wide, it is difficult to organize the sauna benches in such a way that two people can lie on the top benches at the same time. Moreover, we also wanted a bottom bench, so that we can cool down a bit at the end of each sauna session. Fortunately, we are not the tallest (approximately 1.7 meters). Nevertheless, due to its width, the sauna does not offer the space to simply lie down with the two of us.
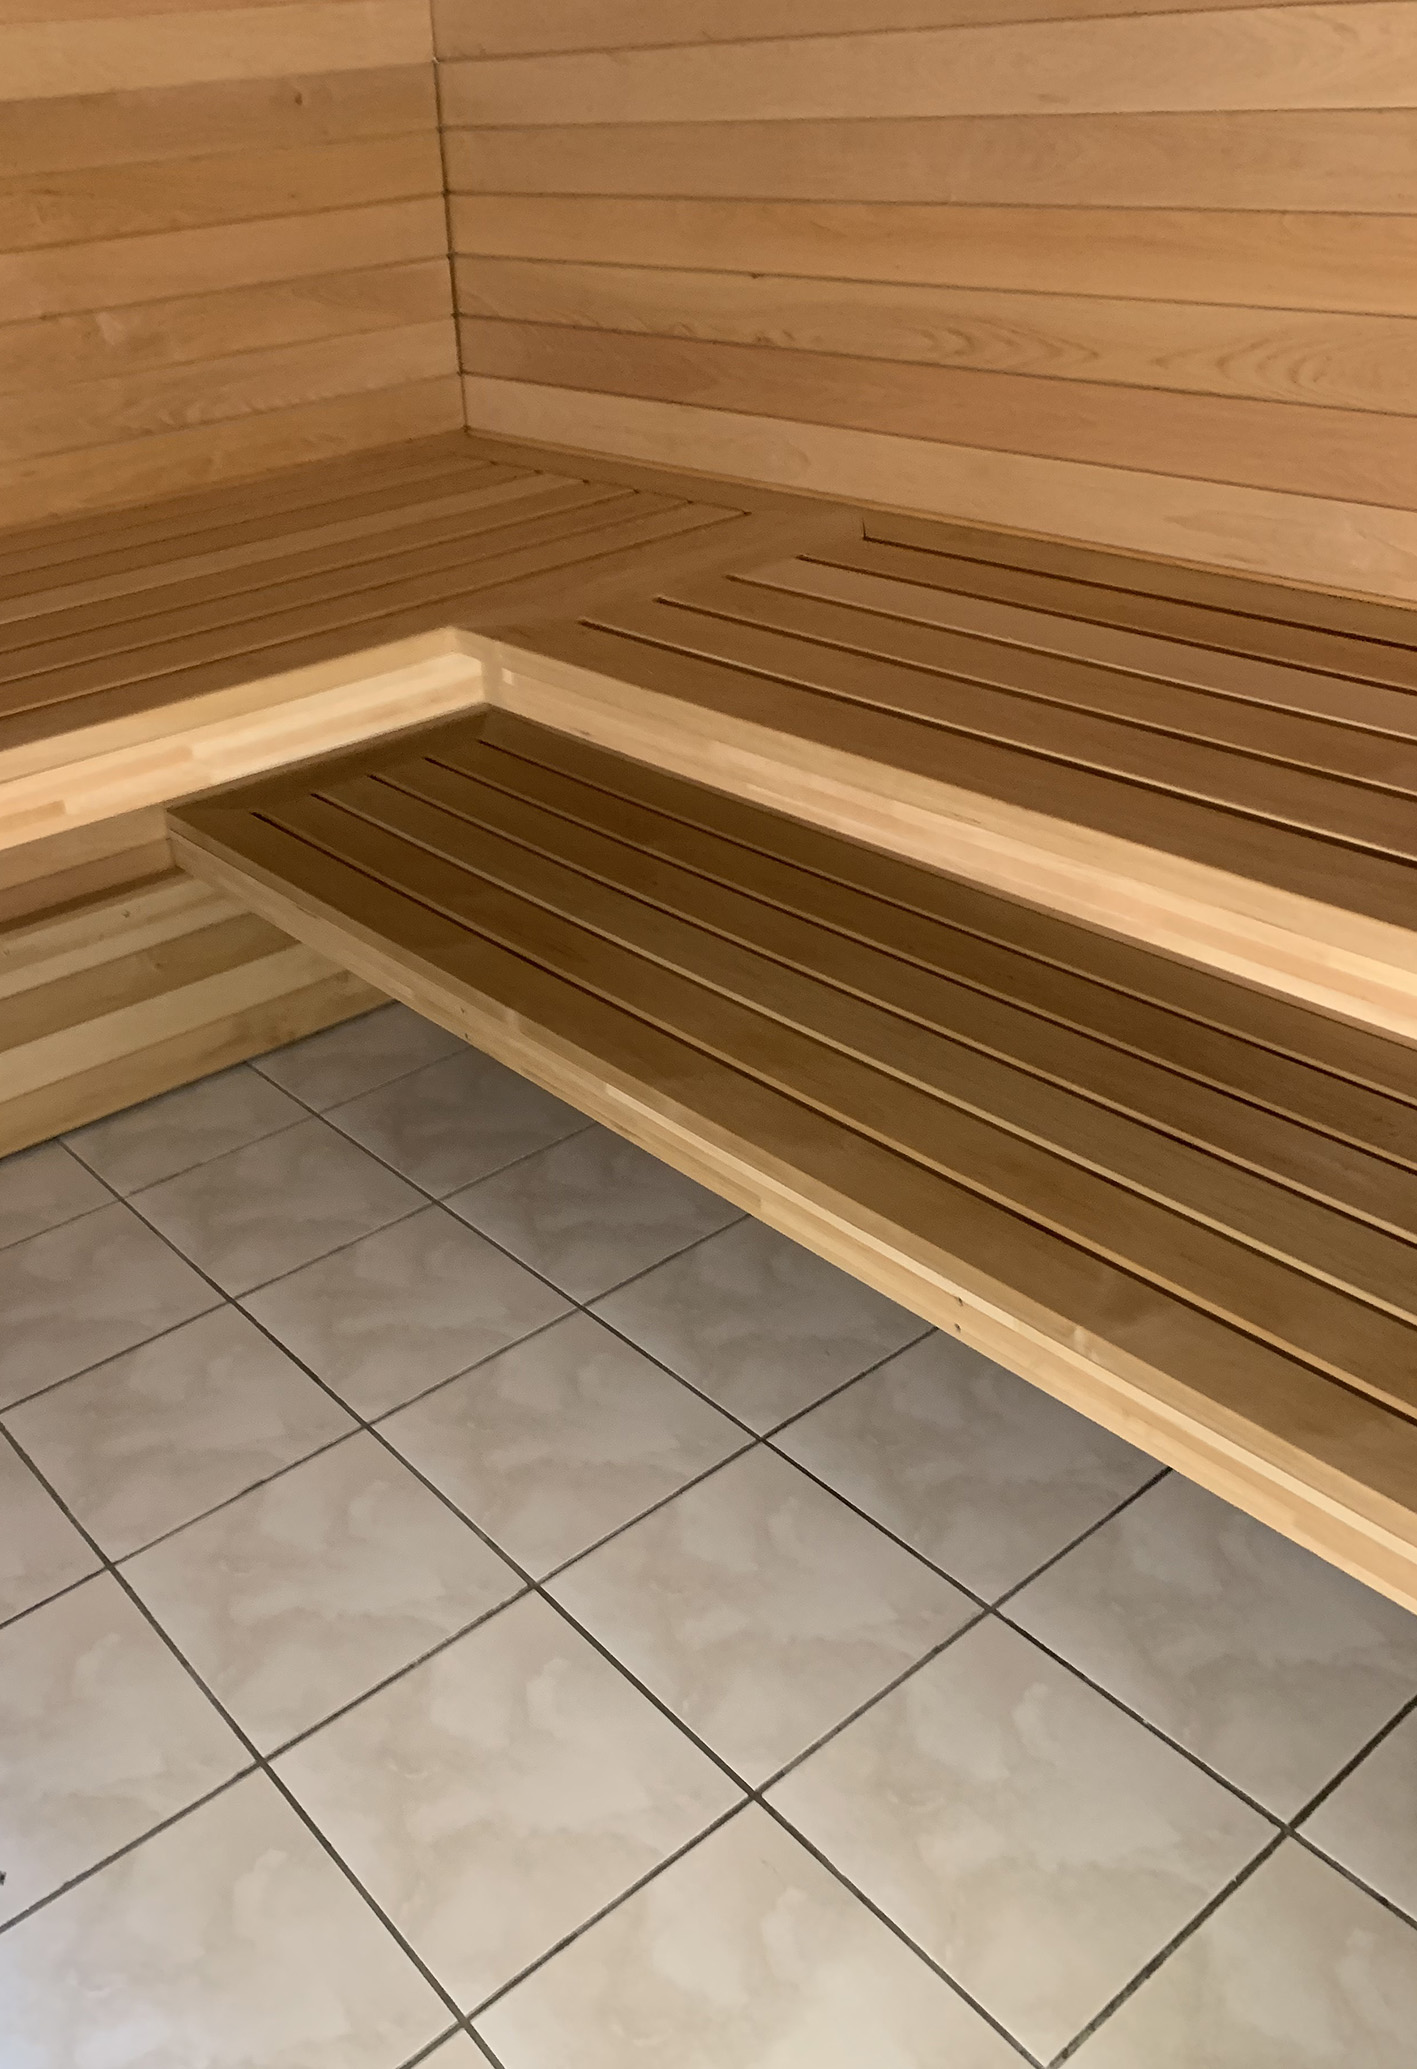
That’s why I thought about a solution for the short bench: most sauna benches are about 60 centimeters deep. However, I made the short bench deeper (82.5 centimeters), so that the depth of the bench can be used to be able to lie completely at an angle.
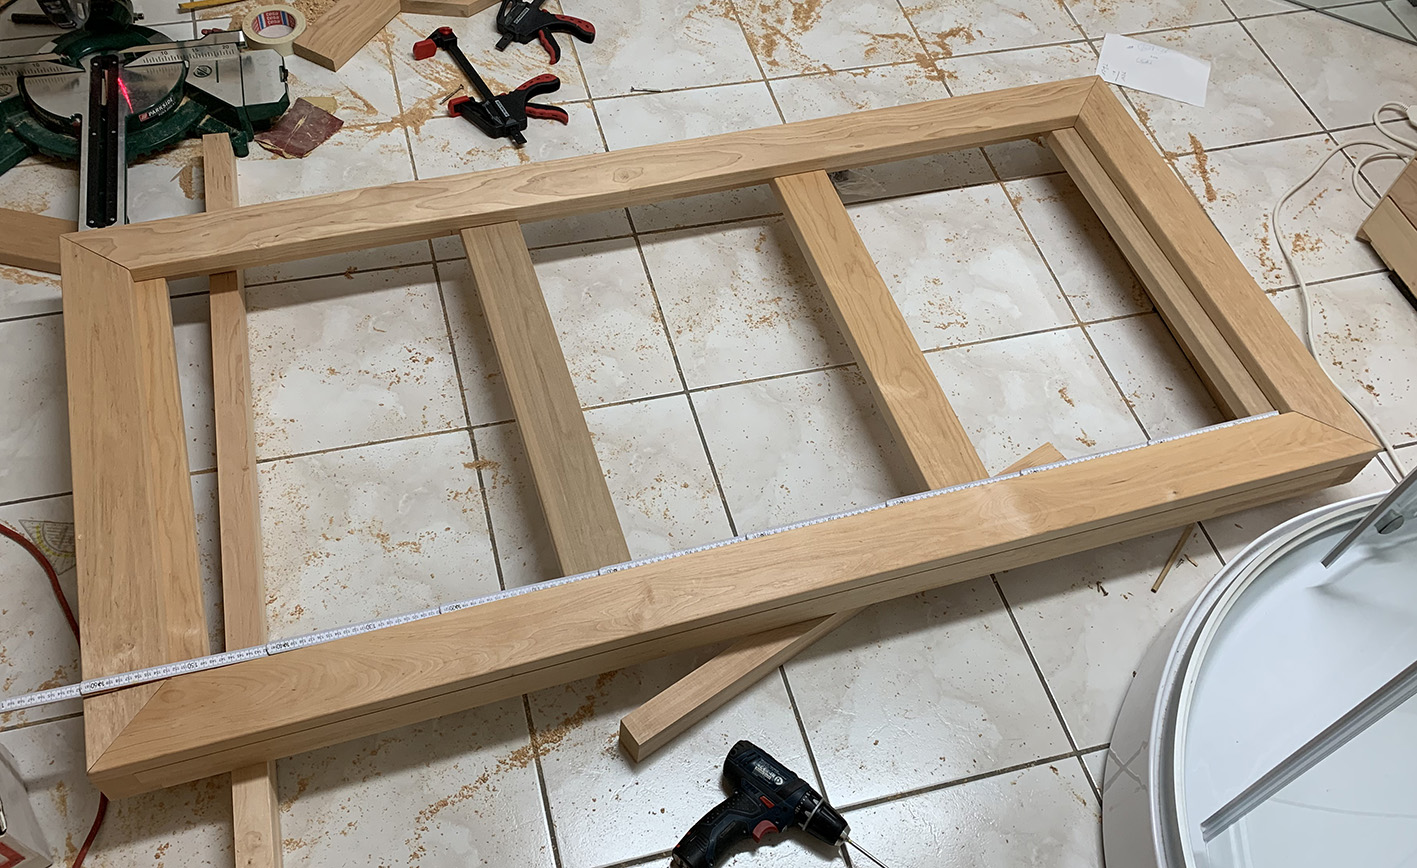
I first designed and fine-tuned the entire planning in 3D software. This way, I could virtually make, discover and correct many planning errors. Moreover, I knew exactly how much wood I would need to build the benches.
Here the 3D model (use the mouse to move the model in any direction):
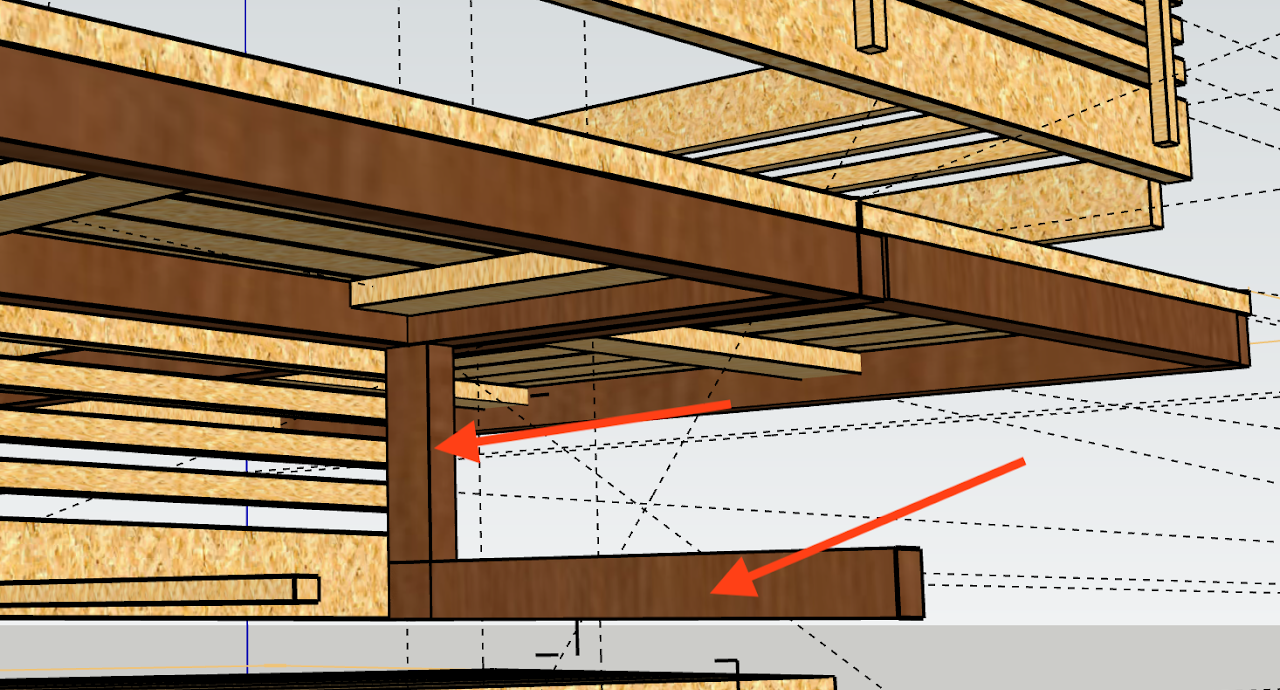
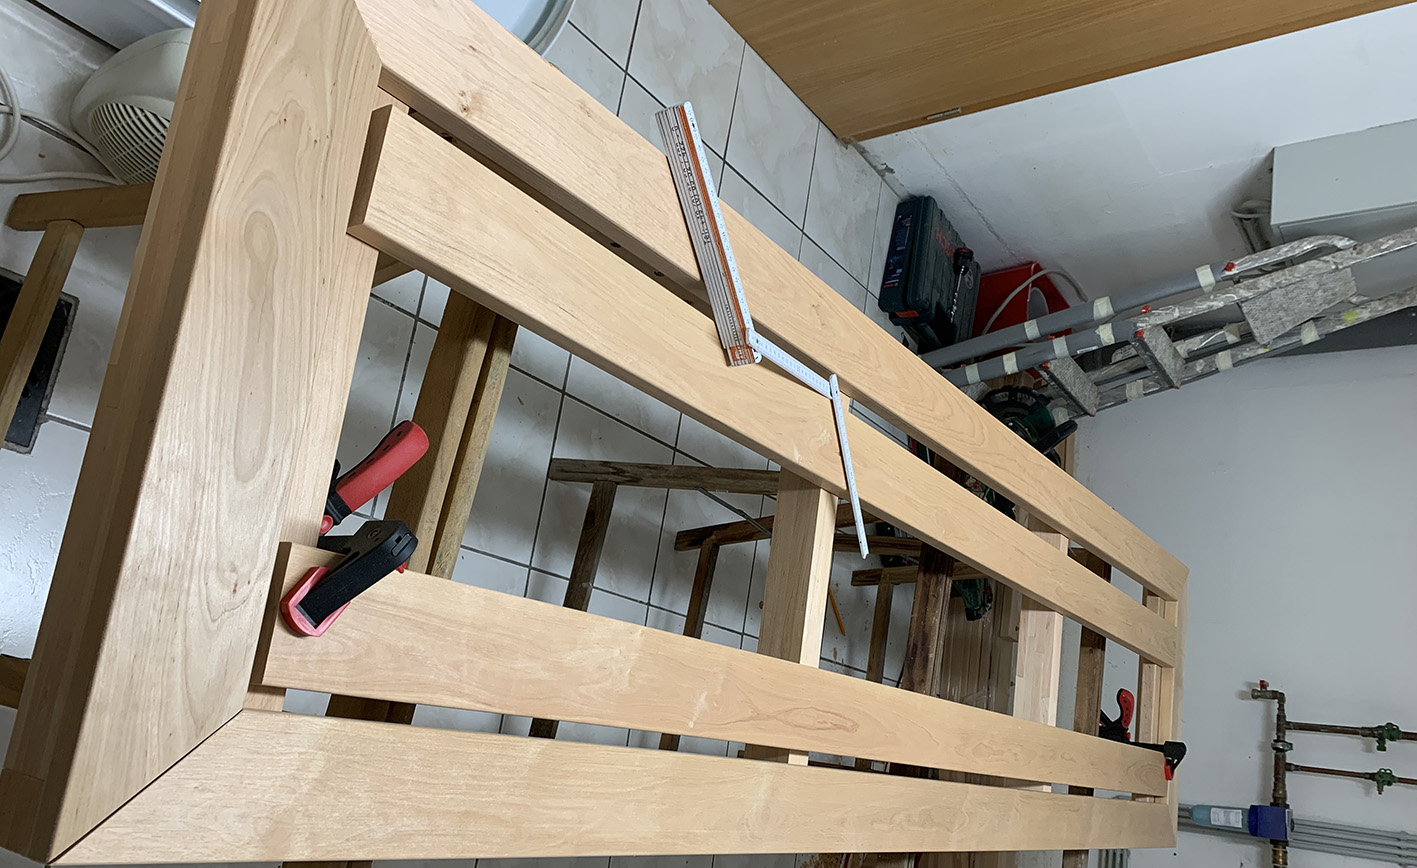
Just one example of how the 3D software helped me improve my original idea: At the point where both top benches meet, a lot of weight comes together when both benches are occupied. Because I was not sure whether the connection with screws and two threaded rods (8 mm) would be stable enough, I added a vertical beam to the model, which is then horizontally connected to the sauna wall. In this way the entire weight at that point not only pushes down, but the construction also transfers part of the weight to the wall.
Due to the 3D planning, the actual building of the benches went very smoothly, because I had already made all plans (and errors) in the 3D model and corrected them. So with the 3D model next to me, I only had to saw the woodwork to the correct length and screw them together.
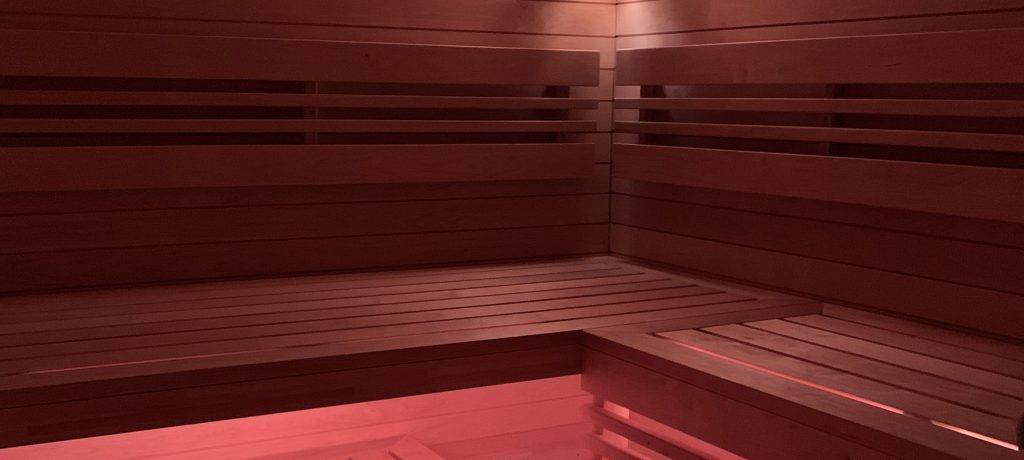
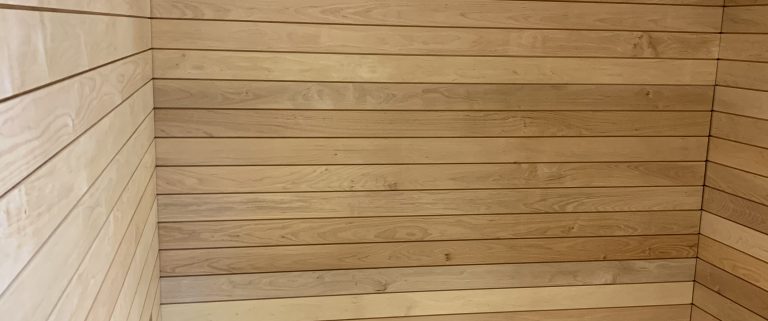
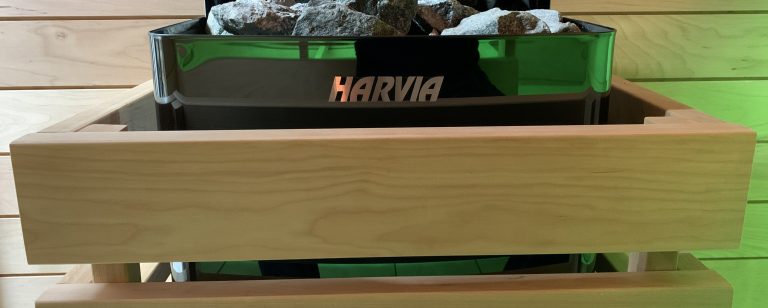
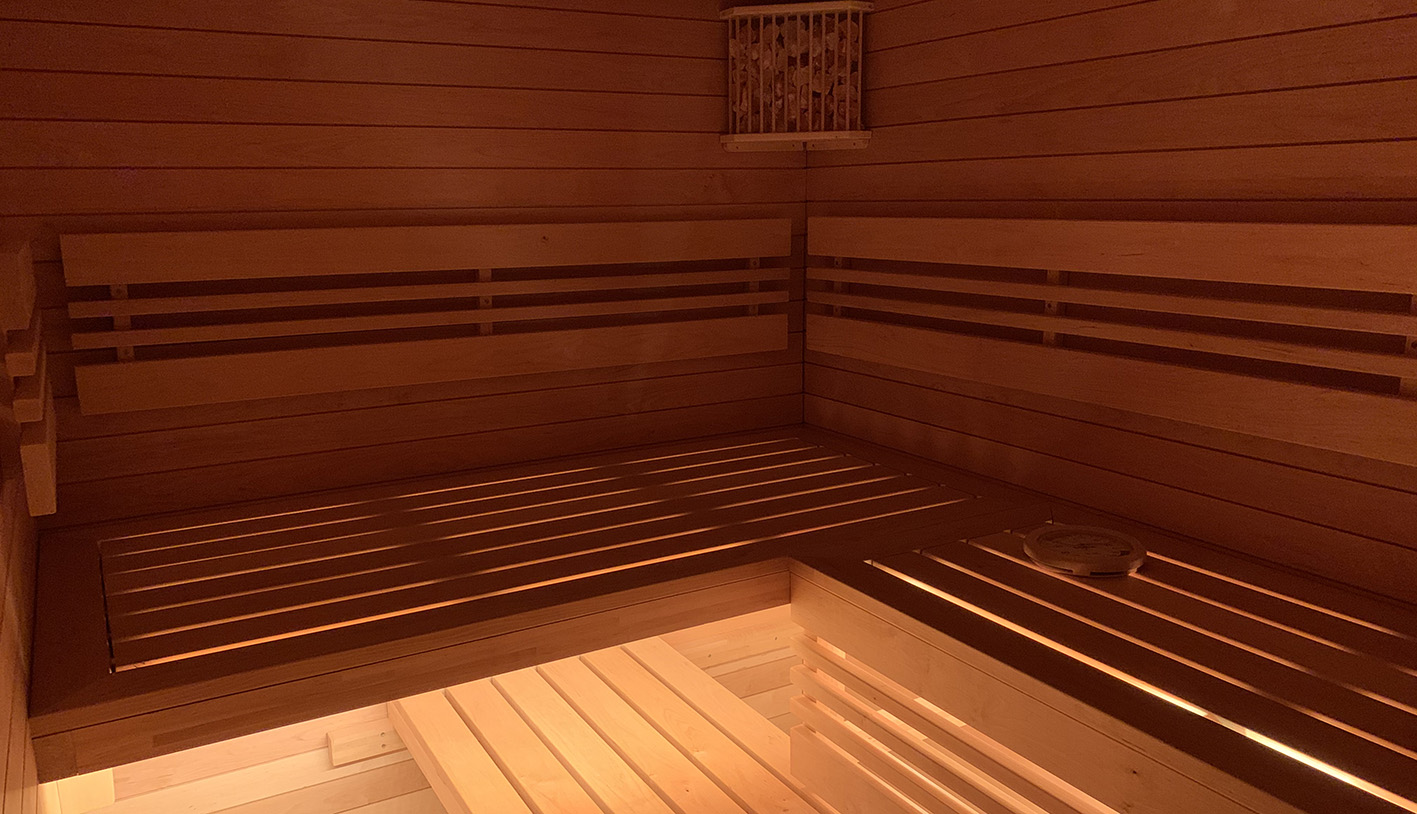
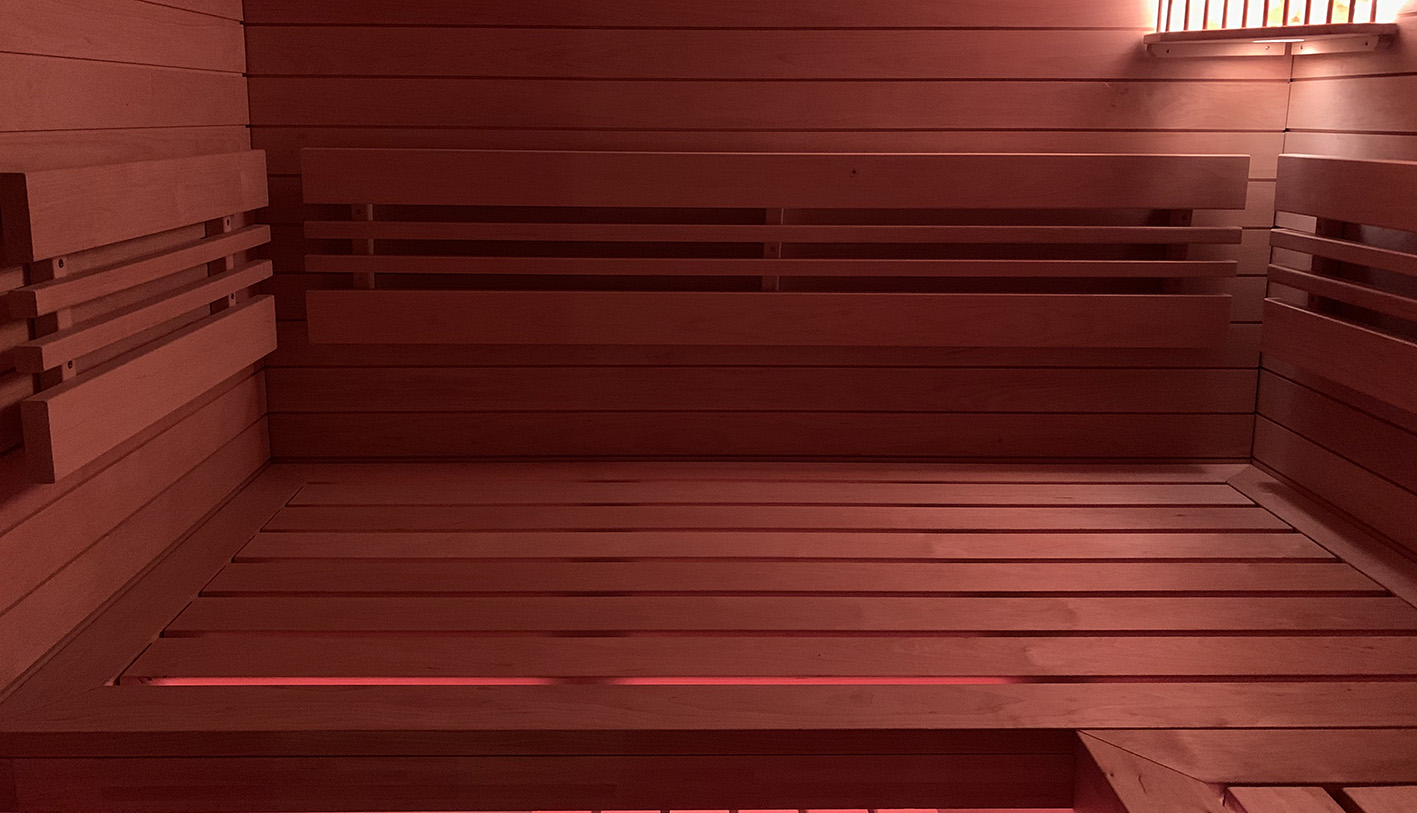
Here, too, I wanted something special optically. On the one hand, I liked the combination of wide and narrow slats for the backrests and the oven coverings. On the other hand, I also wanted something more than the standard sauna bench, where simply a few slats are attached next to each other.
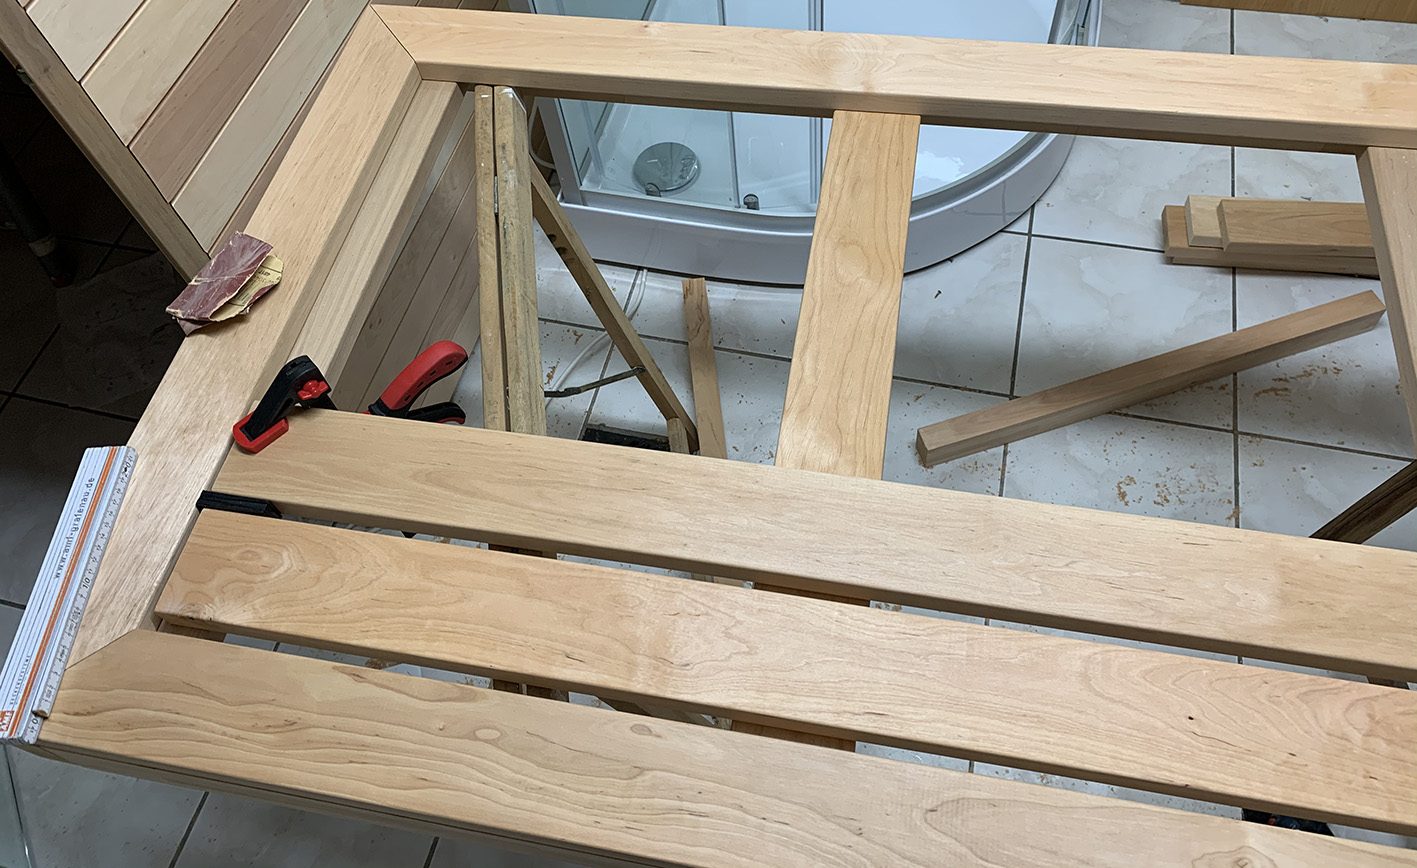
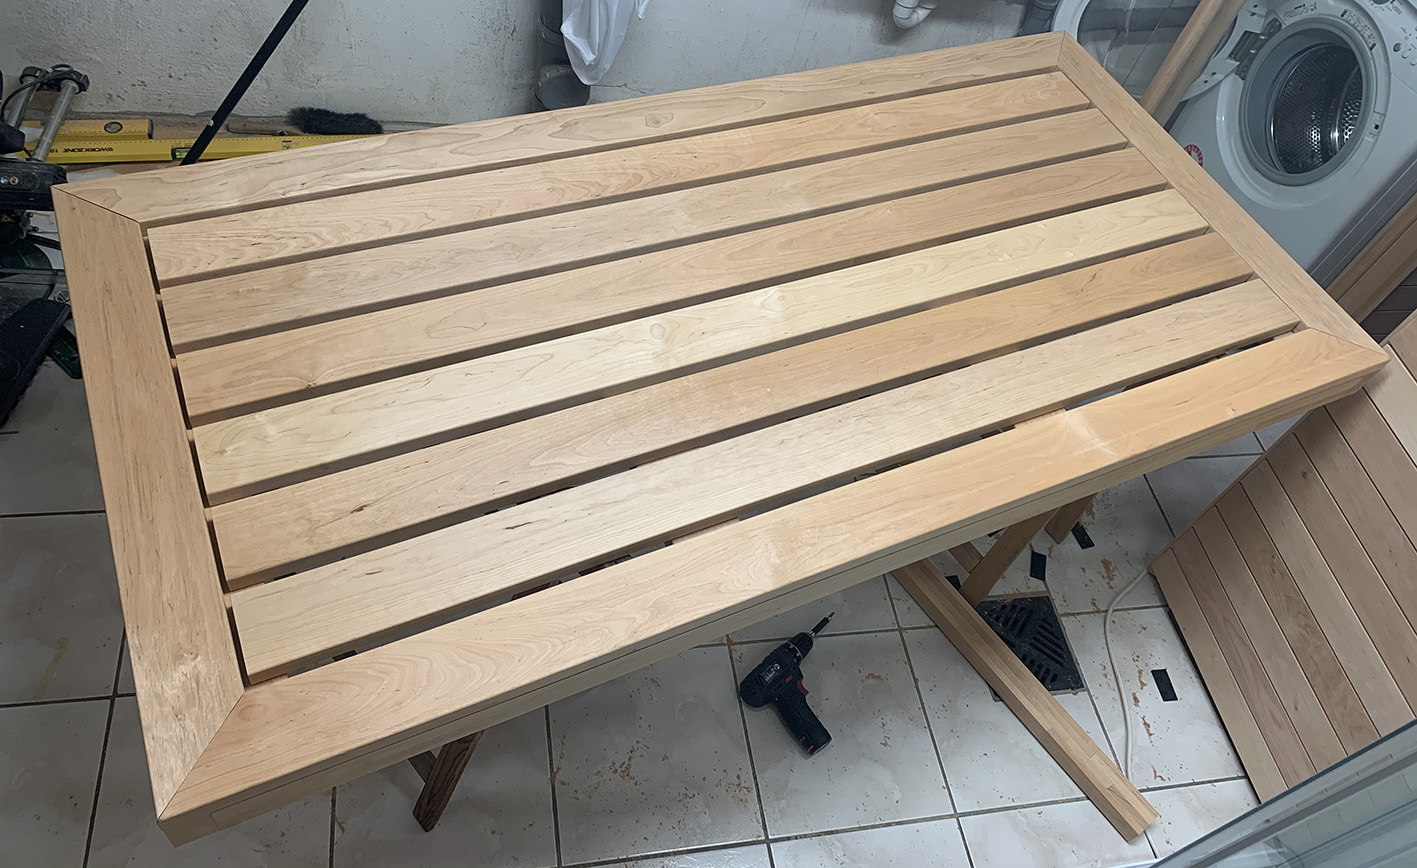
In search of alternatives, I found a fellow do-it-yourselfer who had used a beautiful design. The outer frame of the bench is sawn and attached at an angle of 45 degrees, and then that “frame” is filled with slats. That is one time more (and very precise) work, but it will look fantastic forever! Find the source of that design here.
This is how it looks:
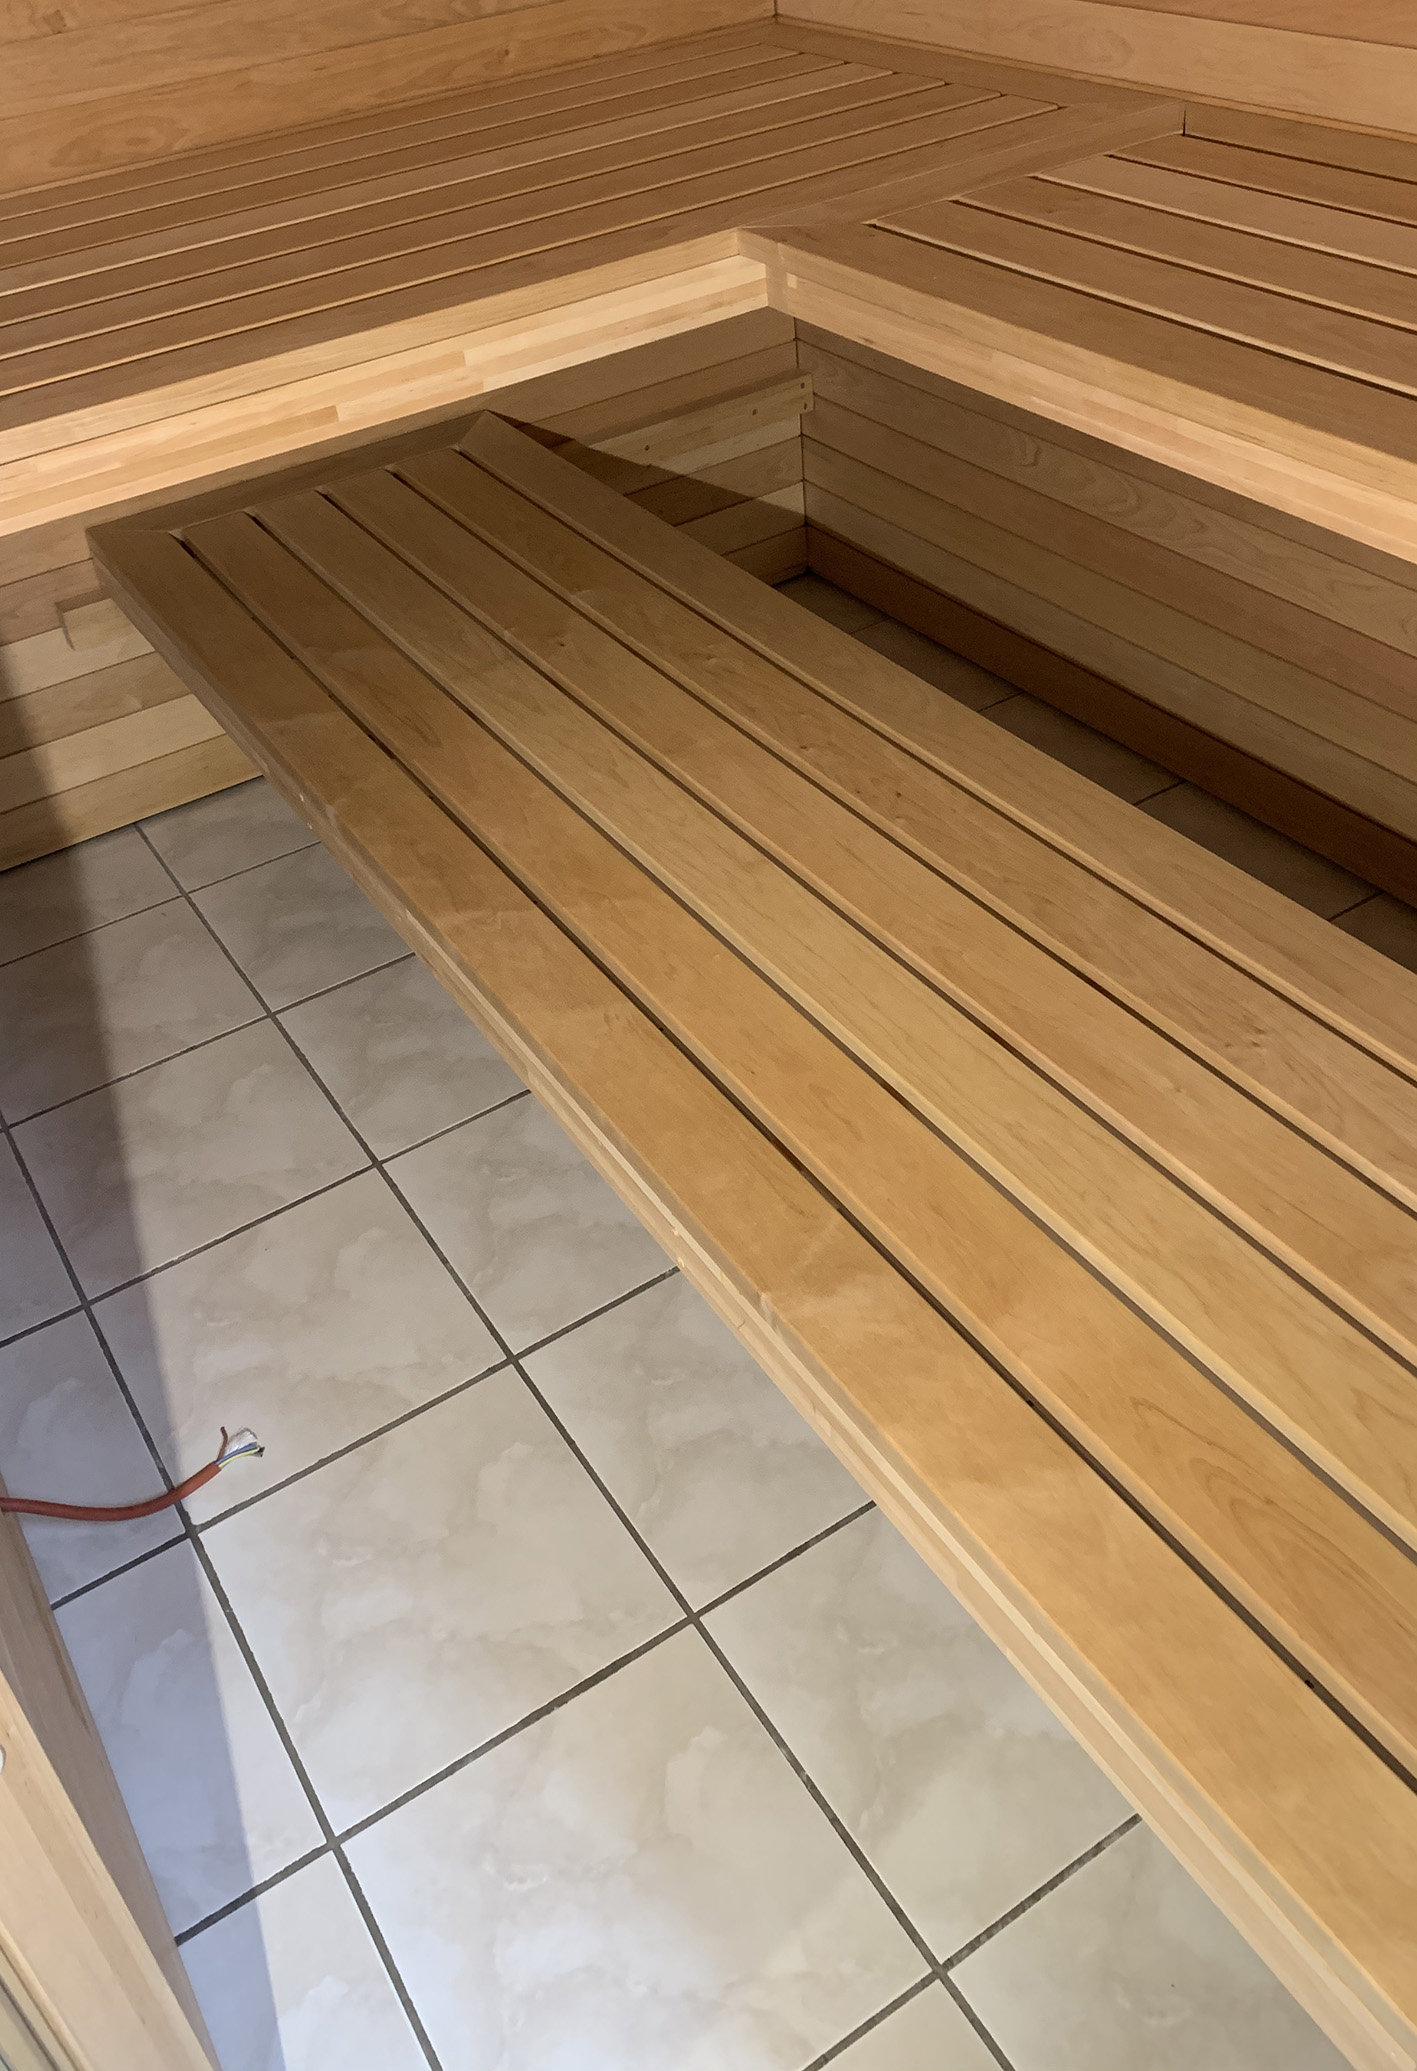
After the benches were ready, they only had to be attached to the sauna wall. The top benches are screwed directly into the sauna wall (in the beams, of course!). The lower bench rests on two beams, which are also screwed into the beams of the wall construction. As such, the lower bench can be slid back and forth along its entire length (2,3 meters), if necessary.
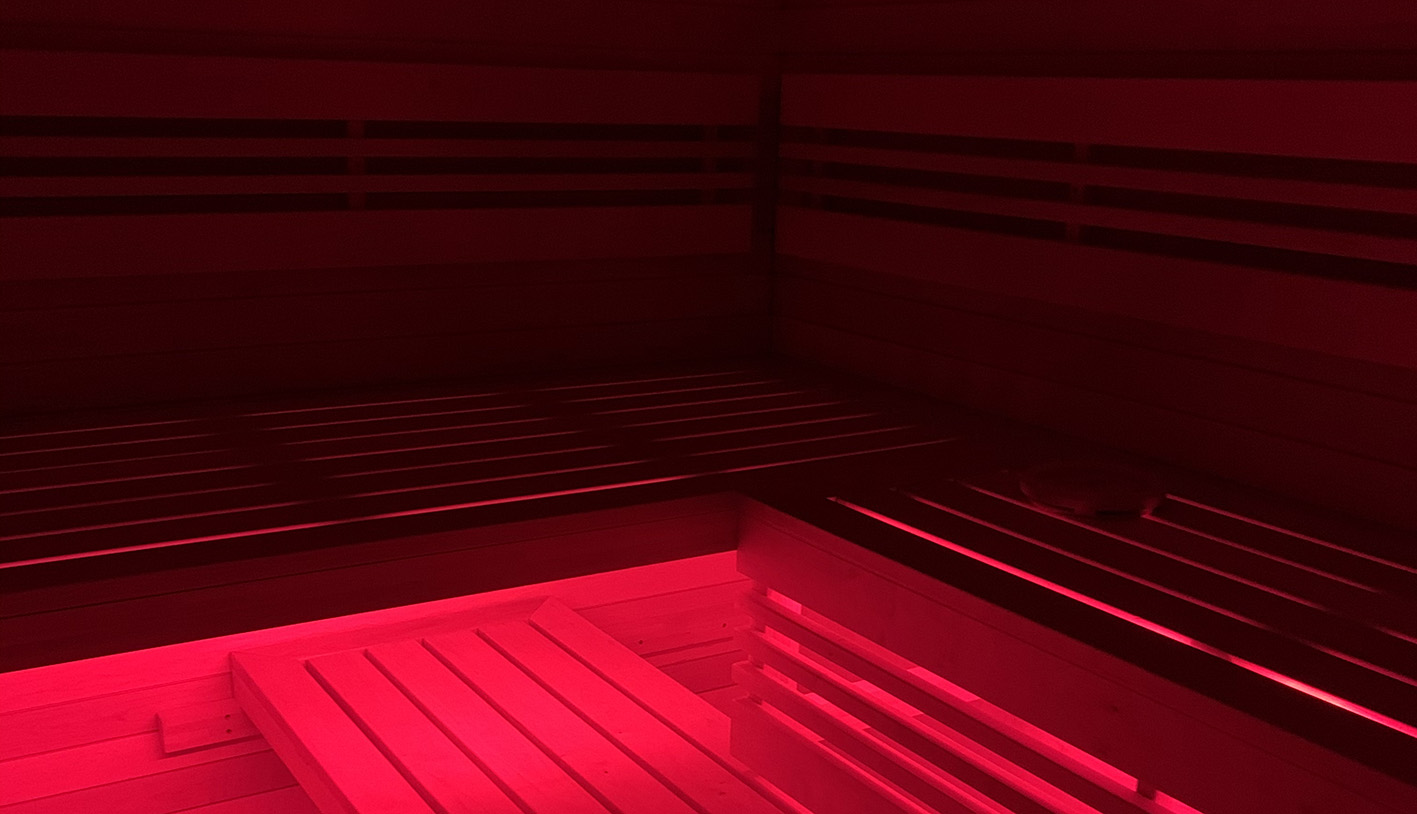
The final work inside the cabin were the backrests and the oven furnishing. I made it from a combination of 90 mm slats and 28 mm slats, to create a modern look. I also installed an LED color strip underneath the top bench, which is pleasantly dimmable.
Now, the inside of the sauna is ready.